
Step-by-step guide
How to Fit Roller Blinds
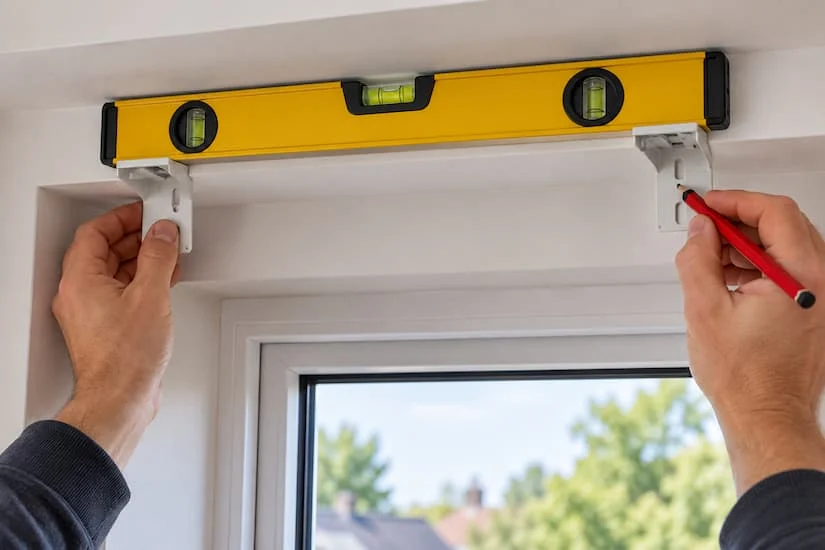
Mark the bracket positions, check them with a spirit level, drill, fix, clip the blind in and test it before you tighten anything fully. Allow twenty minutes for the first window and ten for each one after that.
- Fitting is included in our quoted prices
- Child safety devices installed to BS EN 13120
- We clear up and take the packaging away
What you need: a cordless drill, a 6 mm masonry bit (or a 2 mm pilot bit for timber or uPVC), a pozi screwdriver bit, a spirit level, a pencil, a tape measure, and the screws and plugs supplied with the blind. A second pair of hands is useful on anything over 1.5 m wide but not essential.
Before you drill: three checks
- Check the blind is the right one. Unwrap it, confirm the width against the window, and confirm the control side is where you wanted it. Do this before any hole exists.
- Check what is behind the surface. Use a detector over the lintel area. Cables to a light switch or a window sensor frequently run down the side of a reveal, and a heating pipe under a sill is not unusual. If you cannot check, drill shallow and stop the moment the resistance changes.
- Check which way the fabric rolls. Standard roll means the fabric comes off the back of the tube, closest to the glass. Reverse roll means it comes off the front. Standard roll gives a smaller gap at the sill; reverse roll clears an obstruction such as a handle or a deep sill. Get this wrong and the blind hangs the wrong way round.
Fitting inside the recess
- Hold the blind up in place and decide how far back from the front edge it should sit. Somewhere between 20 and 40 mm back usually looks right and keeps the fabric clear of the front edge. Note the measurement so both brackets match.
- Position the first bracket hard into the corner of the recess, at the depth you noted, tight to the top. Mark through both screw holes with a pencil.
- Position the second bracket at the other end, the same distance back and the same distance down. Do not measure it from the first bracket: measure both from the ceiling of the recess, because the recess itself may not be level.
- Check with the spirit level. Rest it across both marks, or use a straight edge between them. If the recess ceiling slopes, level the brackets to the spirit level, not to the ceiling. A blind fitted level in a sloping recess looks right; a blind fitted parallel to a sloping recess looks wrong.
- Drill. Masonry bit and plugs for brick or concrete; a 2 mm pilot hole straight into timber or uPVC frame. Drill to the depth of the plug, no further.
- Fix both brackets and check they are firm. A bracket that moves under thumb pressure will let the blind drop.
- Clip the blind in. The pin end goes in first on most systems, then the control end clicks home. You should hear or feel it seat.
- Test before you finish. Lower the blind fully and raise it fully, twice. Watch whether the fabric tracks sideways. If it does, unclip and check the brackets are level: a tracking blind is almost always an unlevel bracket, not a faulty blind.
- Fit the child safety device. See the section below. This is the step people skip and it is the one that is a legal requirement.
Fitting to the wall or the frame (face fit)
- Mark the height first. Decide where the top of the blind sits, usually 50 to 100 mm above the window opening, and draw a light pencil line across at that height using the spirit level. The line, not the window, is your reference.
- Mark the bracket positions on the line, setting each one in from the end of the tube by the amount the instructions specify, usually 20 to 50 mm. Centring the brackets rather than spacing them wide will make a long blind sag.
- Check the wall. Above a window you may be drilling into a concrete lintel, a timber lintel, a catnic steel lintel or plasterboard over a cavity. Concrete and timber are fine. Plasterboard needs proper hollow-wall fixings, not the plastic plugs in the bag. Steel needs a self-tapping screw and a slower drill speed.
- Drill and fix, then check both brackets are firm.
- Clip the blind in and test as above, then confirm the blind clears everything it needs to: the handle, the sill, the radiator, and the window when it opens.
- Fit the child safety device and screw it into a solid surface, not into the blind itself.
If the top of the window is plasterboard over a cavity, common where a lintel has been boxed in, use metal hollow-wall anchors rated for the weight. The plastic plugs supplied with blinds are for masonry. This is the single most common cause of a blind pulling out of the wall six months later.
Child safety: the part that is not optional
All internal blinds supplied or installed in the UK must comply with BS EN 13120:2009+A1:2014. Any blind with a looped chain or cord must have the loop kept out of a child's reach by a device that either holds it taut against the wall (a cleat or tensioner) or breaks apart under load (a breakaway connector).
- Fix the device to the wall or frame, not to the blind. A tensioner screwed into the plaster does not work; it needs a solid fixing.
- Set the height so the chain loop cannot reach 1,500 mm above the floor or lower, which is the height the standard works to. Measure it: do not judge it by eye.
- Wrap the chain fully if you are using a cleat, every single time. A cleat with a loose loop hanging beside it is the same hazard as no cleat.
- Keep cots, beds, sofas and anything climbable away from the window. A safe chain height means nothing if a child can stand on furniture to reach it.
If the blind is going in a child's bedroom or a nursery, the better answer is to remove the hazard rather than manage it: order the blind cordless or motorised in the first place. There is then nothing to fit, nothing to wrap and nothing to forget.
Troubleshooting
The fabric tracks to one side
Almost always an unlevel bracket. Unclip, put the spirit level across, and correct the low side. If the brackets are level and it still tracks, the fabric is not square on the tube: that is a manufacturing fault and the blind should be replaced.
The blind will not stay up
On a chain system the clutch has probably not seated. Unclip the control end and re-seat it. On a spring system the blind needs re-tensioning: take it down, roll the fabric on by hand a few turns, and refit.
It rolls up crooked at one end
The fabric has crept over time. Take the blind down, unroll it completely, and re-roll it by hand keeping the edge aligned with the end of the tube. Refit and it usually settles.
The chain jumps or slips
The chain has come off the sprocket inside the clutch. Unclip the control end, re-seat the chain on the sprocket, and clip it back. If it recurs, the clutch is worn.
The blind fouls the window handle
Either move the blind further forward in the recess, switch to a reverse roll so the fabric comes off the front of the tube, or face fit it instead.
There is a gap at the top
The brackets are set too low, or on a face fit the blind sits below the opening. On most systems you can unclip, move the brackets up, and fill the old holes.
Fitting more than one blind
Two practical points that only come up on a whole-house job.
Label everything before you start
Made to measure blinds arrive labelled by room. Keep the labels on until each blind is up. Two blinds 15 mm apart in width look identical in a stack and fitting them in the wrong rooms means taking both down again.
Match the bracket depth room to room
If one blind sits 20 mm back in its recess and the next sits 40 mm back, you will see it from outside the house. Pick one depth and use it everywhere.
In a bay window, fit the centre blind first and work outwards, so any accumulated error ends up at the returns where it is least visible.
When to let someone else do it
We fit blinds for a living, so treat this as informed rather than impartial, but there are a few jobs we would not take on ourselves as a DIY afternoon.
- Anything above a stairwell. Working at height off a ladder on a sloping surface is the most dangerous part of this whole job.
- Conservatory roofs. Tensioned systems, awkward angles and glass beneath you.
- Motorised blinds needing mains power. Battery and plug-in motors are fine to fit yourself. Anything hard-wired is electrical work. See motorised roller blinds.
- Steel lintels or unknown wall build-ups. If you are not sure what is behind the plaster above the window, that is a good reason to hand it over.
Fitting is included in our quoted prices across London, Essex and North Kent, so for most customers this is not a separate cost to weigh up.
Related guides
How to measure roller blinds
Recess and exact fit, with the deductions.
How to clean roller blinds
Keeping the fabric right once it is up.
Child-safe and cordless blinds
Removing the cord hazard entirely.
Made to measure vs ready made
Which one you should be fitting.
Motorised roller blinds
Battery, plug-in and hard-wired options.
How much do roller blinds cost?
Prices with fitting included.


